Julian Straub
creations and thoughts
Flashing Bootloader onto Arduino Mini Pro
The Arduino Pro Mini comes without a USB interface for programming. This is great during operation since the board only has the minimal set of peripherals needed to operate the ATMega328p. This reduces power consumption and makes the board smaller.
Programming of the Pro Mini can happen through the serial interface with one of the standard USB to serial converter boards (5V version, 3.3V). This way we only need to have a single one of these USB to serial boards and can program any number of Arduino Pro Minis.
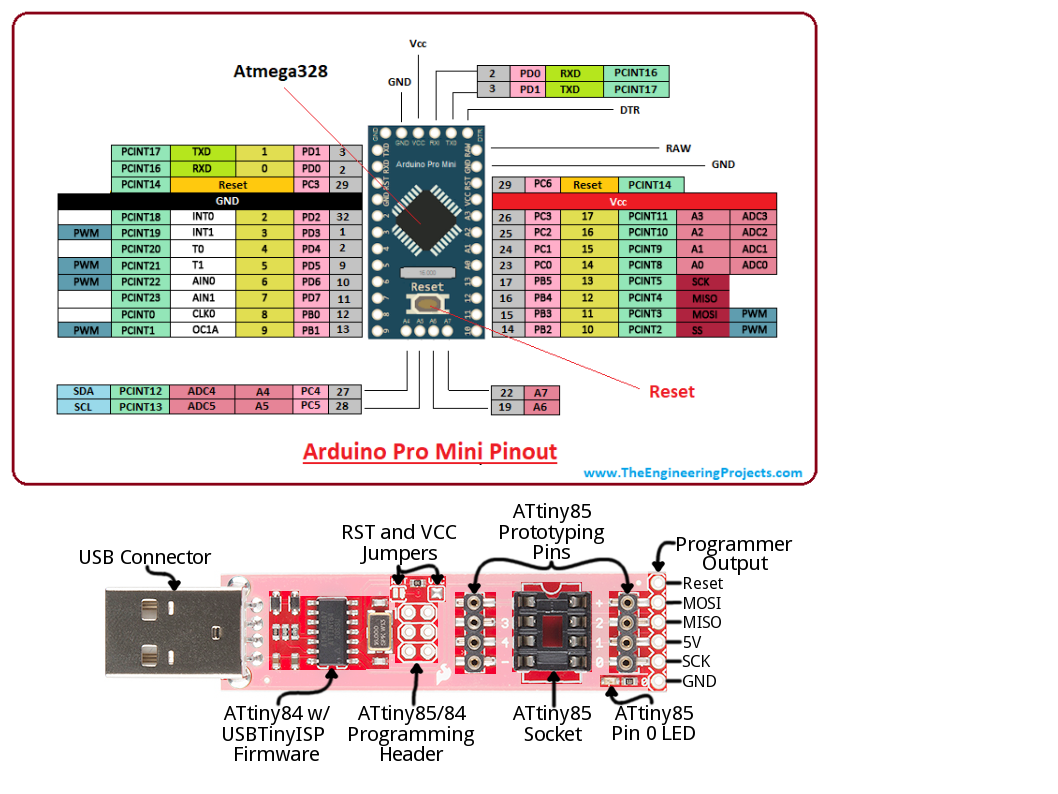
Before this can happen though, we need to install the bootloader which flashes the chip with the data from the serial interface. This is done using the in system programming (ISP) interface and needs to be done only once. I like using the Tiny AVR Programmer.

- connect the Arduino Pro Mini and the SPI connector as shown above If you are flashing a 5V Pro Mini all pins can be connected directly. If your Pro Mini is a 3.3V version then I recommend connecting all pins via 1k-10k resistors and to connect the 5V from the Tiny AVR Programmer to the “Raw” input of the Pro Mini.
start the Arduino UI and select:
Board: "Arduino Pro or Pro Mini";
Processor: which ever one you have;
Programmer: "USBTinyISP" (or whichever one you have).
hit “Burn Bootloader”
unplug the Tiny AVR board and connect the USB-serial board
select the right Port (/tty/USB0 for me) and flash a simple “Blink” program to make sure it works.